เริ่มจากต้องทำการขอ Line Token ซึ่งดูได้จากบทความ การส่ง Line Notify ด้วย Command Line
จากนั้นให้สร้าง bat file โดยเปิด notepad แล้วใส่คำสั่ง command line ดังนี้
curl -X POST -H “Authorization: Bearer Token” -F “message=XXX” https://notify-api.line.me/api/notify
โดยที่ตัวอักษรสีแดงให้ทำการแทนที่ดังนี้
Token แทนที่ด้วย Line Token ที่ขอไว้ตอนต้น
XXX แทนที่ด้วย ข้อความที่ต้องการส่ง

แล้วให้ save file ด้วยนามสกุล .bat
เปิด Task Scheduler ขึ้นมา แล้วกดที่ Create Task

ใส่ชื่อ task ที่ช่อง Name

กดที่tab Triggers แล้วกดปุ่ม New

ที่ Begin the task เลือกเป็น At startup
ติ๊กที่ Delay task for แล้วเลือกเป็น 1 minute แล้วกดปุ่ม OK

จะได้ผลดังรูป

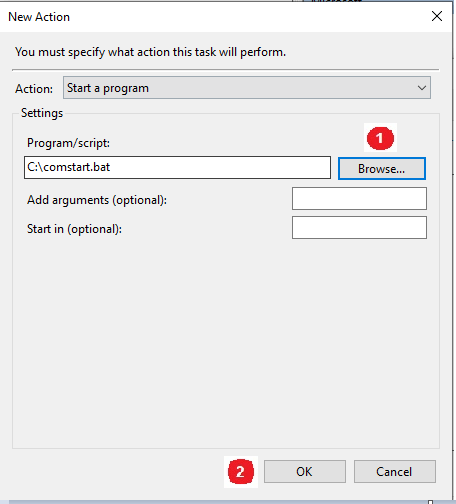
กดที่tab Actions แล้วกดปุ่ม New

กดปุ่ม browse เลือก file bat ที่สร้างไว้ตอนต้น แล้วกดปุ่ม OK
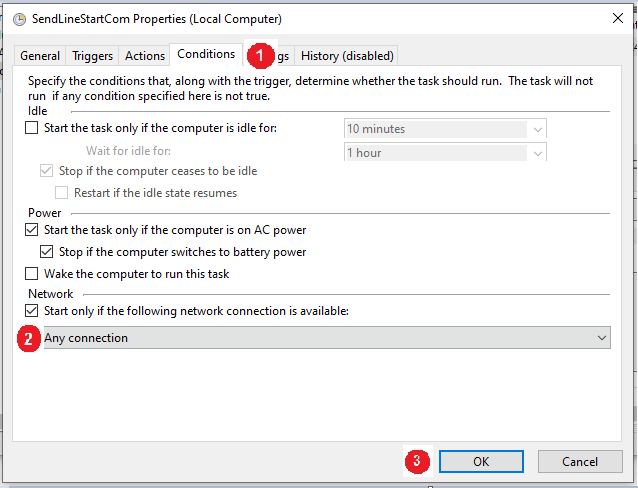
กดที่tab Conditions
ตรงส่วนของ Network ให้ติ๊กหน้า Start only if the following network connection is available
กดปุ่ม OK
กดที่ปุ่ม OK อีกครั้งตามรูป

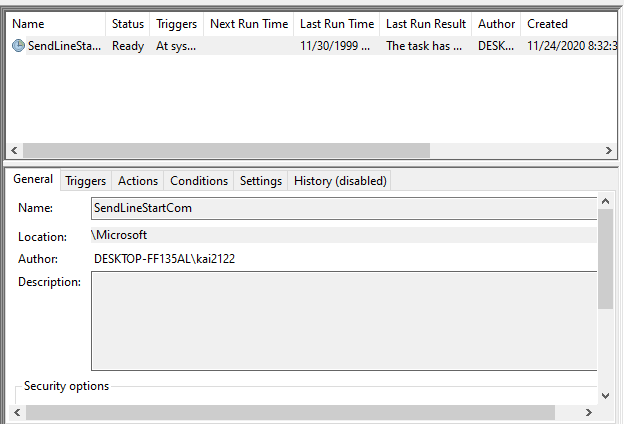
จะมี task ที่สร้างขึ้นปรากฏดังรูป
เมื่อมีการ start computer จะมีข้อความส่งไปทาง Line ดังรูป

Leave a Reply